Wednesday 18 May 2011

Conclusion

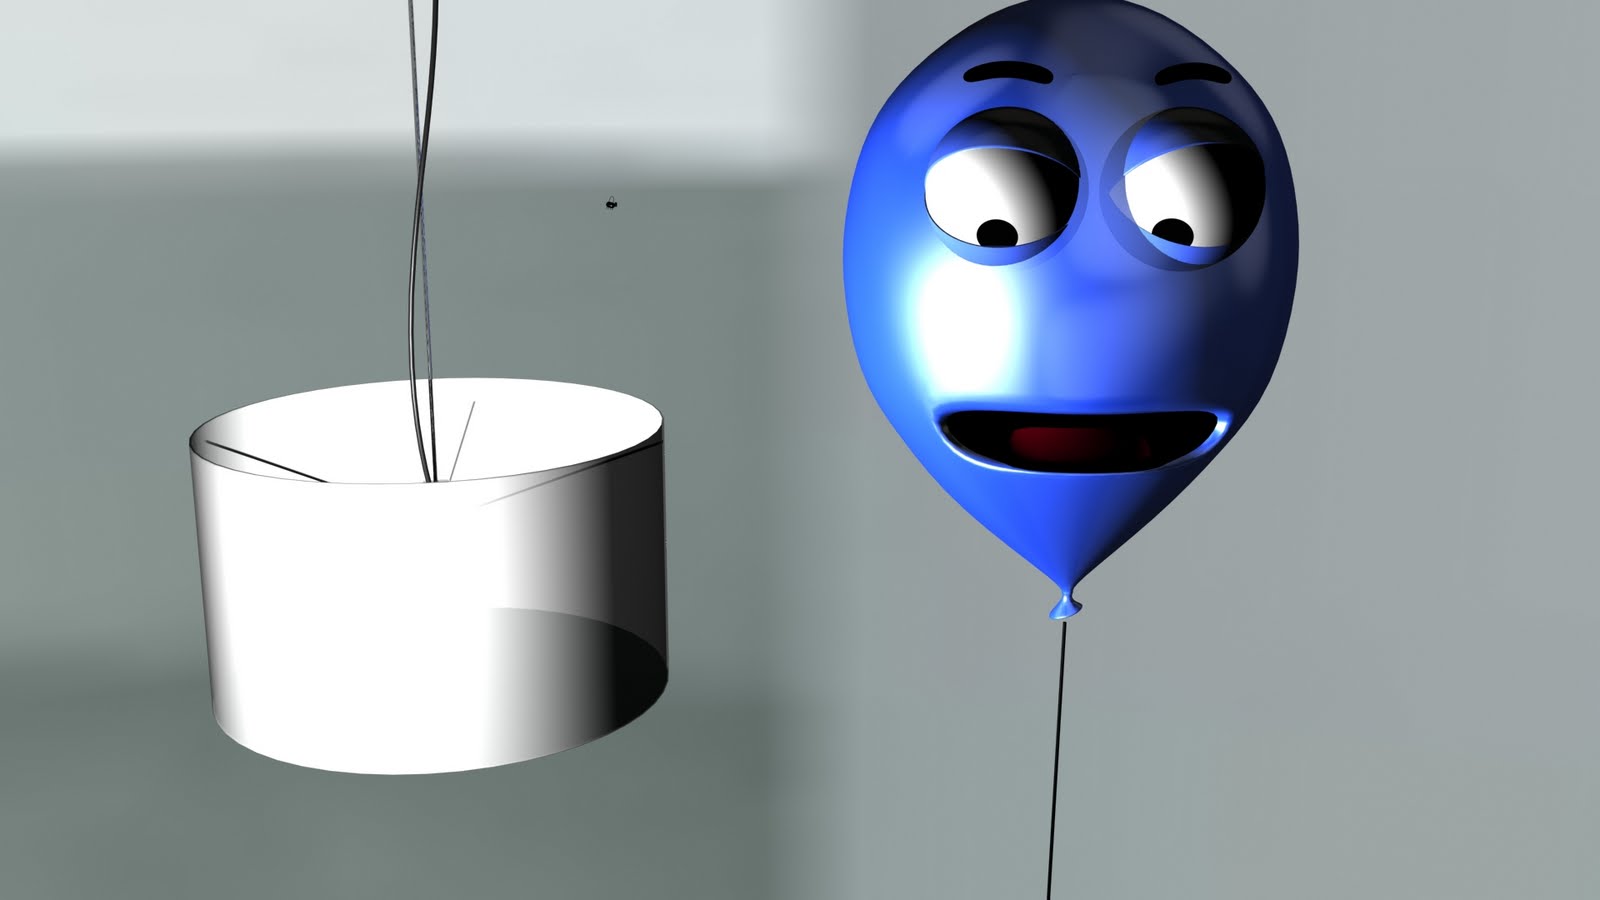
The aim of the project was to design and create a character with convincing behaviours. I think my Balloon Boy character does this a lot throughout my film. He touches on a lot of emotions but mainly the character is usually elated or distorted! It was quite challenging to get a clear emotion out of a balloon because without the use of a body it meant that the face had to exaggerate his behaviours. The character himself I think is quite likable and matches the ideas that Disney has been producing recently in their Pixar movies.

Throughout this module I have had to make a lot of design decisions to get things right. One of the main decisions was to cut three of my scenes and add two new ones. This was difficult because I did liked the cut scenes a lot but I didn’t think they were funny enough or they would be hard to achieve.

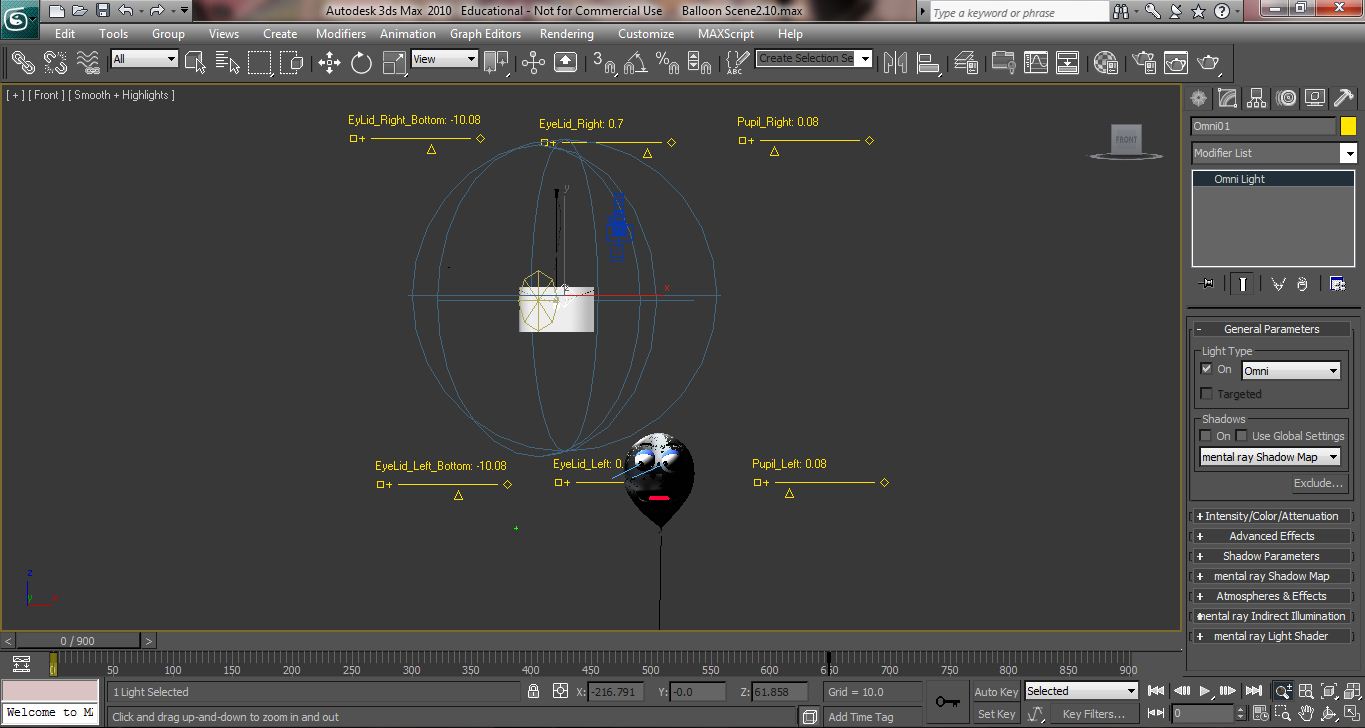
I have tried to use new techniques in this animation for example I have used Controller Sliders, Deformers (FFD Boxes), Morpher Modifier and lip syncing. It would of been nice also to use the a Reactor modifier but after a lot of trails it didn't really work for me.

Overall I have enjoyed creating a character that was a bit different to the ‘norm’ and voicing all the vocals myself was quite fun. It would be nice to develop the model more so that it could be stretched and manipulated more like a balloon would be able to. I think 4 to 14 year old's would enjoy the trials and tribulations of Balloon Boy and I hope they'd learn some things about the real world.

Final Render

The last stage of the development was to edit my videos in Adobe Premier Pro but this wasn't without problem! The issue I had was that Premier didn't like the codecs that I had used in Max, for some reason the MJPEG codec that gave me the best results in Max couldn't be used in Premier!?! After searching around the Internet I couldn't find a free codec to use, so I had to resort to encoding them all again using Adobe Encoder. This time I encoded them as MP4s. Once In Premier I needed to add a few transition stages in the film so the sketches faded nicely together. I originally wanted to do seven sketches and title each with the day of the week. But as I only did four I decided to title them Morning, Afternoon, Evening and the Next day. This I thought would give the sketches more of a story feel. This was a decision that I pondered about for a while because I think it may of looked better just having each clip fade into each other. After watching the final cut I think now the transitions may go on for a couple of seconds to long.

Wednesday 11 May 2011

The Outro/Credits

For the outro/credits I wanted to link it nicely with the last scene. The last scene fishinesses with the screen in total darkness so I thought it would be nice to carry that into the credits.So instead of just having white text with a black background I decided have black text with a black background but use a directional light to slowly flash the text in then out. First I had my own name flash up and then when the light dies down I animated the text out of the way and replaced it with the Balloon Boy logo.


Throughout the credits I played a silly outro tune that complimented the intro. I also had to add the fly! I thought it would be fun if he ended up surviving and you never know he might appear again in a later Balloon Boy episode!

Scene Seven - Part 2

In the second part of the scene Balloon Boy looks down and laughs at the fate of the fly not actually realising that he is in trouble. I wanted to show of a few different types of emotion. First I want him to be happy and a bit cocky next I want him to show panic and sadness then finally scarred and petrified. This would be hard to get them emotions across in a small space of time.


To set this scene up I first added a camera to the scene and linked it to balloon boy so when he moved up the camera would follow him. Next I created some clouds. This were made simply by going into the Gizmo panel then choosing the Gizmo Box from the Atmospheric Apparatus drop down. Here I created lots of random boxes in the rough shape of a cloud. Next I went to the environment and Effects window and choose Volume Fog under atmospheres. Then I could pick the Gizmo boxes from the section bellow and change the parameters to make the cloud look realistic.

The clouds were then duplicated and position above the balloon so he past them. This would give the impression of him rising high into the sky. I also added a windy sound effect to make it some like it was a bit more turbulent up there.


In the back ground I positioned a 747 Jumbo Jet (turbosquid.com) that was on a collision course with our main character. This ended up being the trickiest part of the scene. First I needed to scale the Jet up so it looked realistic, next I had to make the Jet hit Balloon Boy at the exact time and at a high speed. I did this by changing the animation tangents to linear so the Jet didn't slow down. I also had to place the Jet along way back in the scene so it looked fast and was in the background for the hole scene and try. It wasn't as straight forward as I thought it would be!

Finally I wanted to give Balloon Boy a final face of terror. To do this I used the FFD boxes I created earlier. The problem I had with these boxes is that I couldn't get them to move with my model for some reason. (Wouldn't link!?!) So what I did was place the boxes at the top of the balloons trajectory so when the balloon reached them his eyes would stretch. I also added the sound of the Jet to co-inside with the scream.


Scene Seven - Part 1

The first part of this scene is meant to give a reason for Balloon Boy to be let go outside so he can be hit by the jet. I liked the idea that the fly is the reason that he goes up. The male character I did at first want to be a little girl but I thought the hand looked like an adults. (and I would of had to find a girl to do the voice!)


The fly starts to annoy the character he moves around. Here it didn't look very realistic because the string looks like a solid rod. As soon as the hand opens the string shoots out.

In the scene I pointed a directional light on to the hand to give a nice dark shadow inside the hand. This was good because even though I added a my own skin material and bump map it didnt make the nails on the hand look good so the shaddows helped cover these up.

Timing the animation to the voice recording was the key here to make it look believable. When he says "Take that fly" the hand must close shut the fly must be in the hand and the fly sound must stop all at once. Once rendered it look quite good. It was quite a lot of effort to do such a small scene but I thought it was essential to get the sketch going and it broke up the amount Balloon Boy will be seen.


Scene Seven

For this scene I needed a human hand to hold the balloon. The hand model was downloaded from turbosquid.com and then placed over a biped. The next stage was to add a skin modifier to the hand. This would prove quite tricky because all of the vertices had to be weighted properly to each finger. After a lot of tweaking I finally got the fingers working, although it wasn't perfect and there were parts of the model that crunched up, but it looked O.k for the short shot I needed to take.

I was thinking of having Balloon Boy in shot but there were a couple of reasons why I didn't. First the hand looked too small if he was in the shot and it looked strange that only the hand could be seen. Secondly I wanted the string to act realistically so I tried to use the rope reactor but it didn't seem to work properly because I couldn't get it to move like it was attached to a balloon.

Monday 9 May 2011

New Scenes - Storyboard

Here is my storyboard for my new scenes. These scenes came to me while I was creating the first two scenes so I decided to give them ago because they looked like they would be fun to do and they would be amusing.


  • Scene 7 - This is going to be the final scene in the animation it shows the hand of a male character who lets go of Balloon Boy because the fly starts to annoy him. Balloon Boy then rises up through the clouds looking down and laughing because the fly has been bugging him also. The sketch climaxes when a 747 jet crashes into him.

Thursday 5 May 2011

Intro Scene

For the intro I already had an angle that I wanted to lean towards. I liked the style of the Old cartoon intros from the 40s and 50s. Cartoons such as Merrie Melody's, Loony Tunes and Disney used a simple intro that was easily recognizable.


The character would be at the centre of the animation and sometimes they would say their catchphrase with a silly tune playing as backing music. Taking these ideas into consideration I wanted to make sometime similar.


Firstly I searched the internet for good background that wasn't too bright and would would compliment the colourful Balloon character. Next I looked on freesounds.com to see if I could find a silly song to grab peoples attention.


The balloon shaped font was called Greetoon Highlight. This was created by adding a extrude modifier to the text then copying the text and then moving it behind but this time with a bevel modifier attached to it. This made the text bulge out making a nice thick border around the text.


The idea to has the singing balloons rising up through the screen came to me late. The vocals on the song made me chuckle so much that I wanted to add some kind of animation to them. As this Balloon Boy cartoon would part of a series I thought it would be right to give it a strong into and the other different coloured balloon may turn up in future sketches.

Wednesday 4 May 2011

New Scene - Balloon Animal

Looking at my story board I felt there needed to be a balloon animal sketch. I'm not to sure where the sketch will go in the sequence but I feel this isn't important until I finally put the sketches together. The problem I had with animating the balloon animal was that it would be very difficult to animate hands and the the balloon twist into shape. My first thought was to use a trick that 2D animators would use, they would draw clouds to show fast moving and busy animations, for example fight scenes would often have arms and legs poking out of the cloud.


As this is a 3D animation I couldn't find away to recreate this so I thought it would be nice to just concentrate on the facial expressions of the main character. I recorded some distressed vocals that Balloon boy could be lip synced to and I found a nice sound effect of a balloon being twisted and rubbed. Combining these two effects with some eye movement I was hopping to trick the viewer into thinking there was something else going on.


In the final part of the sketch the Balloon animal in shown in full. Here I added the sound of a child laughing to accentuate the embarrassment Balloon Boy may be having and the fact that he has an audience. Last but no means least I added the fly that was in scene two. I thought it would be nice to have a recurring joke that will slightly link the sketches together.


Tuesday 3 May 2011

Scene Two

Scene two gives the viewer a insight into the kind of predicaments and bad luck Balloon Boy gets him self into. Keeping the scene simple and uncluttered was my first design choice. The use of a simple lamp shade would be only object in the scene. The lamp was downloaded for free from an internet site (www.turbosquid.com).


The scene had two key elements; light and the fly. It was important to have the light go out without the scene going to dark. To do this I used two lights one was a directional spot light that shone on the lamp and Balloon Boy and the other was a omni light that I placed right on the shade itself. This light brightened up the shade and emitted a bit more light onto Balloon Boy.


The star of the scene I think is the fly! He buzzes around the light and character until the light goes out and he lays to rest on the end of his nose. I thought this would be an amusing little end to the sketch. I tried to make the fly turn nicely in the air like a real fly would. First I animated the positions I wanted the fly on the time line then I created a utility for the fly. In the Utility panel I clicked on 'More' and then chose 'Follow/Bank'.